 Help Center
Actions are a time-saver as they allow you to skip a step or branch in a walkthrough based on what the user sees on the page.
Firstly, you have an option to either Go to a Step, Go to a Topic or Deactivate the topic when an element is visible or not. Actions are beneficial when you have some UI elements that are accessible only to specific users like Administrators or Managers. For example, you can create a walkthrough where the second step points at Users tab that is only visible for Administrators. You can set up actions: if the Users tab is not there (an element is not visible), go to the next step. This way, you will need to create just one walkthrough. There's no need to create a separate guide for Administrators and a separate one for Managers.
But there's more. You have an option to either Go to a Step, Go to a Topic or Deactivate the topic based on the URL the user is currently on and the element's visibility in your application. You can set multiple URL and Element conditions for the step, and based on where the user is in the application and the assigned element, and it will jump to the specific parts of the walkthrough.
Actions, also allow you to click on an element on behalf of the user automatically. And with an autofill action, you can streamline the user journey and prepare content for them on the fly. This way, you can advance a tour by automatically populating text boxes in your product. You can set this up right in the Authoring Tool while creating a step.
This feature is available only in Standard Pro and Enterprise plans. Please take a look at our pricing options here.

Opening the Actions panel
The Actions panel appears in the Authoring Tool when you create and edit your walkthroughs and tooltips. In this article, we will start at this point and won't include the instruction on building a walkthrough or a tooltip as such. To learn how to create a walkthrough, please check this article and to learn how to create a tooltip, go here.
To open the Actions panel:
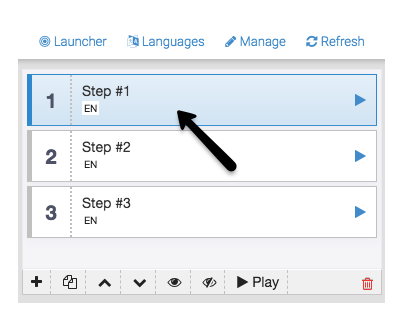
In the Authoring tool, while you're editing or adding a walkthrough or a tooltip, select a step from a list of steps or click _ "+"_ to create a new one.
Scroll down to the Actions panel and expand the tab. Now, you see the Actions panel.


Functionalities of the Actions panel
With the Actions panel, you have an option to either 'Go to a Step', 'Go to a Topic' or 'Deactivate' the topic when an element is visible or not (+ content). Automatically click on an element on behalf of the user (+ click), automatically populate text boxes in your product (autofill), and either 'Go to a Step', 'Go to a Topic' or 'Deactivate' the topic when the user is on a specific URL.
Content action
Let's start with the content action. An action is made of the following parts:
- Phase - when the action will be executed.
- Element visibility - if an element is visible or not.
- An assigned element - the part of your application.
- Reaction - go to a step, topic or deactivate.

Adding an action
To add an action:
- Click the + Content button.
- Add a phase. Select whether Inline Manual will execute the action Before step is activated or After step is activated. If Before a step is activated, Inline Manual will execute the action before the step is activated. For After the step is activated, Inline Manual will perform the action after the step has been activated.

- Select the type of Element Visibility to which you want to respond. These would either be if the element is visible or not.

- Assign element. Click the Assign element button and hover over your application to select the desired element. The Authoring Tool will choose the most specific combination of CSS selectors, and the default option is usually the best. However, to manually set the selector, click on Expert to edit.

To read more about assigning elements, go here.
- Choose a reaction.
Go to Step - Indicates to which step you want to advance. The menu will list all of the steps in your walkthrough. You can choose a relative step, such as the Previous or Next step. Or you can select any step in your walkthrough.

Go to Topic - indicates to which topic you want to advance. The menu will list all topics with their title and topic ID.

Deactivate - deactivates the walkthrough.

Well done! You've created an action! To add a next one, follow the instruction above.
Note that each new action is colour-coded to make them easier to identify. Click the eye button, and the element you have selected will be outlined in that signature colour. 
Note that while editing the steps, the actions are not considered for live preview, only when you click on the Play button for the preview while the authoring tool is minimized.
Multiple actions flow
There can be multiple actions within one step, which Inline Manual will execute one after another. The order of execution is set by order of the actions - you can drag and drop each action to re-order them.
The action will stop executing any following actions: If the action's result is user redirect - go to step, launch topic, deactivate topic.
Click action
We add a + Click feature in the Actions panel to replace the callback's need. You can use this action to click on an element on behalf of the user automatically.
Expand the Actions panel.
Click the + Click button.
Assign an element. Click the Assign element button and hover over your application to select the desired element. The Authoring Tool will choose the most specific combination of CSS selectors, the default option is usually the best. However, to manually set the selector, click the Expert button to edit.
Click the Save button to confirm.
Autofill action
In the Actions panel click the + Autofill button.
Add a phase. Select whether Inline Manual will execute the action Before step is activated or After step is activated. If Before step is activated, Inline Manual will perform the action before the step is activated. For After step is activated, Inline Manual will execute the action after the step has been activated.

Assign an element. Click the Assign element button and hover over your application to select the desired element. The Authoring Tool will select the most specific combination of CSS selectors, and the default option is usually the best. However, to manually set the selector, click Expert to edit. To read more about assigning elements, go here.
Provide the value with which you want to fill in the assigned element.

- Click the Save button to confirm.
Well done! You've created an action! To add a next one, follow the instruction above.
Advanced action
This action allows you to jump to a step/skip a step based on the URL the user is on and the element's visibility. You can set multiple URL and Element conditions for the step, and based on where the user is in the application and the assigned element, it will jump to the specific parts of the walkthrough.

- In the Actions panel click the + Advanced button.

- Add a phase. Select whether Inline Manual will execute the action Before step is activated or After step is activated. If Before step is activated, Inline Manual will perform the action before the step is activated. For After step is activated, Inline Manual will execute the action after the step has been activated.

Add a URL condition. This condition checks the current URL the user is on. You can select: matches don't match, contains, doesn't contain.
Provide the URL value.
Now, you can add _ element_ condition_ by providing an element's selector. It works the same as in the Content action described above.

You can create multiple URL and Element conditions (with AND rule). As long as all of these conditions match, Inline Manual will execute the action.
Click the Save button to confirm.
When to use actions?
Actions are beneficial when you have some elements of your application that are accessible only to specific users. Imagine you have a navigation menu in your product: Dashboard | Content | Users and Users section is accessible only to Administrators. If you want to create a walkthrough explaining the menu, you would need to make two of them, one for Administrators that includes the Users section, and the second one for other segments that exclude users section.
With Actions you can create just one walkthrough with the second step pointing at Users section and settings in the Action panel: if the Users menu is not there (an element is not visible), go to next step.
Actions, also allow you to click on an element on behalf of the user automatically. And with an autofill action, you can streamline the user journey and prepare content for them on the fly. This way, you can advance a tour by automatically populating text boxes in your product.